


Guide to Using Respondo.ai
In this guide, we will cover how to prepare the system for use. Connecting your channels is covered in a separate guide.

Step 1: Create an account
- Enter your store name:
- Use the name of your store so the system can remember it.
- Fill in the other details:
- Complete the registration by filling out the required information and create your account

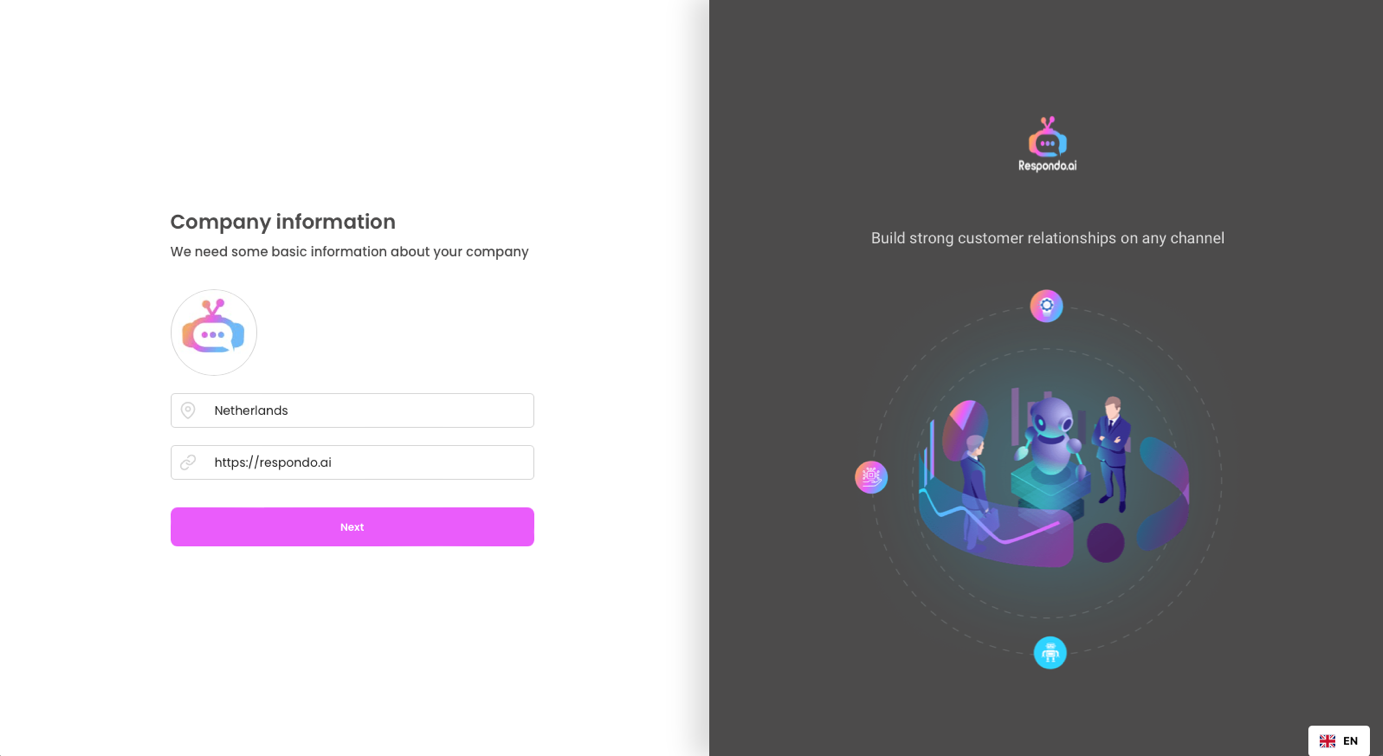
Step 2: Upload Information
- Upload your logo, location and the link to your store:
- Respondo.ai uses this information to learn everything about your company.
- Automatic scraping:
- After entering the link to your website, the system scrapes this and relevant information to answer the first questions.
Step 3: Continued
Congratulations, your account has been created! We now move on to how to get the system ready for use. The linking of channels is explained in another specific manual per channel.

Step 4: Tuning the AI
- Get to know the system:
- The system has already created classifications relevant to your business and will scan messages for sentiment (positive/negative/neutral) to consult relevant data and provide an appropriate response.
- Go to Settings > Automation > AI settings:
- For each classification you have two options:
- Use of Respondo AI:
- Responses are generated from your data, with options for Autopilot or Copilot.
- Use of your own standard templates
- Add unlimited custom templates and use them in messages to your customers.
- Use of Respondo AI:
- For each classification you have two options:
- Automation options:
- Copilot: generates answers based on your data and previous chat logs that you only have to send yourself.
- Autopilot: Automatically sends the generated responses.
- Setting up Respondo AI:
- By default, everything is on standard templates. Set this to 'Respondo AI' in the dropdown menu.
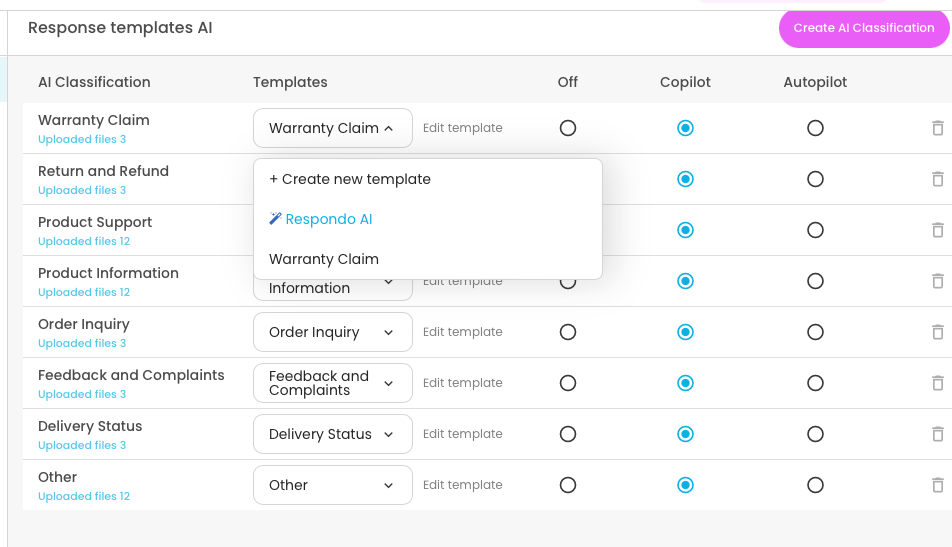
Starting advice:
- Start by combining templates on 'Respondo AI' with the Copilot function enabled. This allows the AI to automatically generate all the answers for you. All you have to do is press send. Autopilot is also possible, but it is recommended to explore the system first.

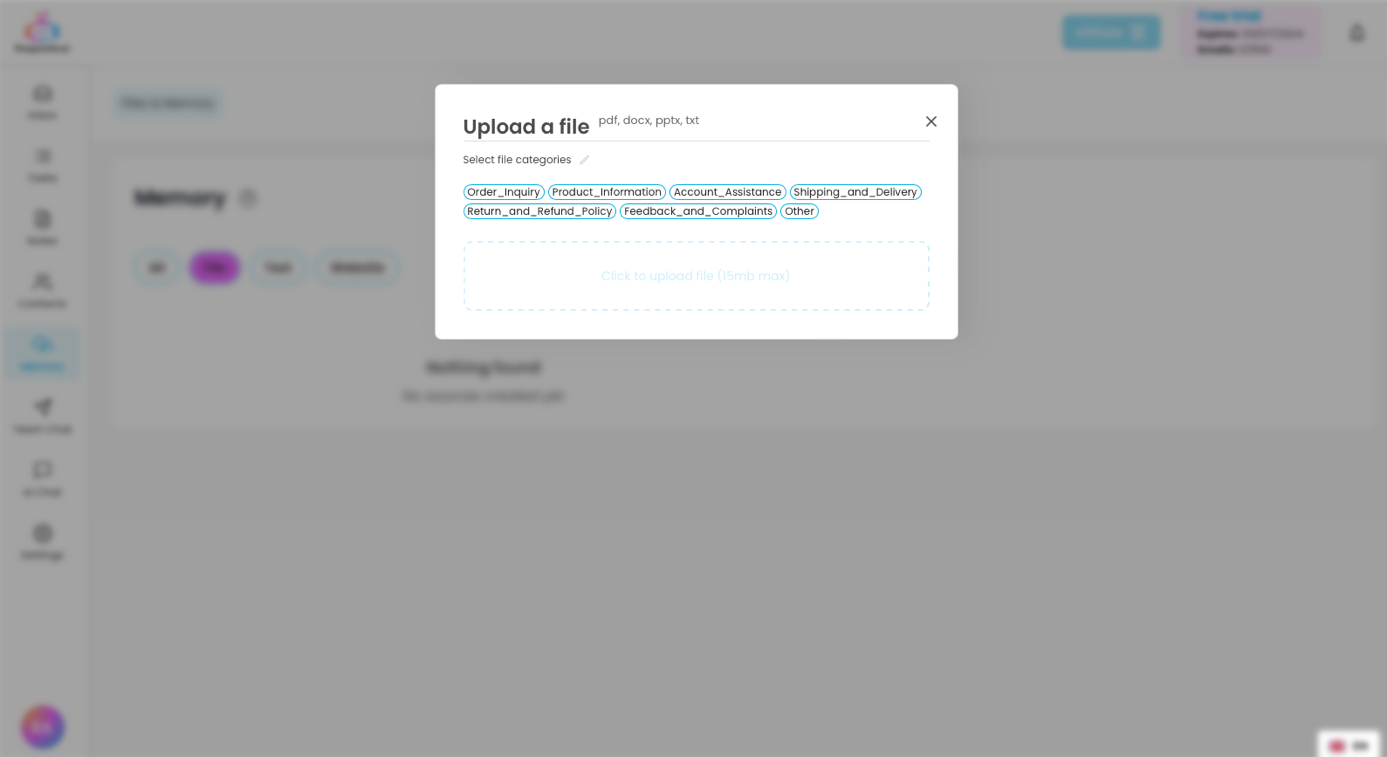
Step 5: Upload Data
- Go to 'Memory':
- Upload all relevant company data such as manuals, returns policy, privacy policy, general terms and conditions, etc.
- Also upload other relevant web links for scraping.
- Upload a set of rules for the AI and the most frequently asked questions:
- Sample files are available that can be adapted to your specific situation. Feel free to supplement this with your own data.
- Supported file formats:
- PDF, DOCX, PPTX, TXT (max. 15MB).
- Important note:
- For the most frequently asked questions and the set of AI rules, it is important that you select ALL classifications.
Download sample templates: https://bit.ly/45S243C
Related Articles
.svg)
We've built an AI-driven platform that makes managing all customer interactions across various channels easy.


.svg)
.svg)